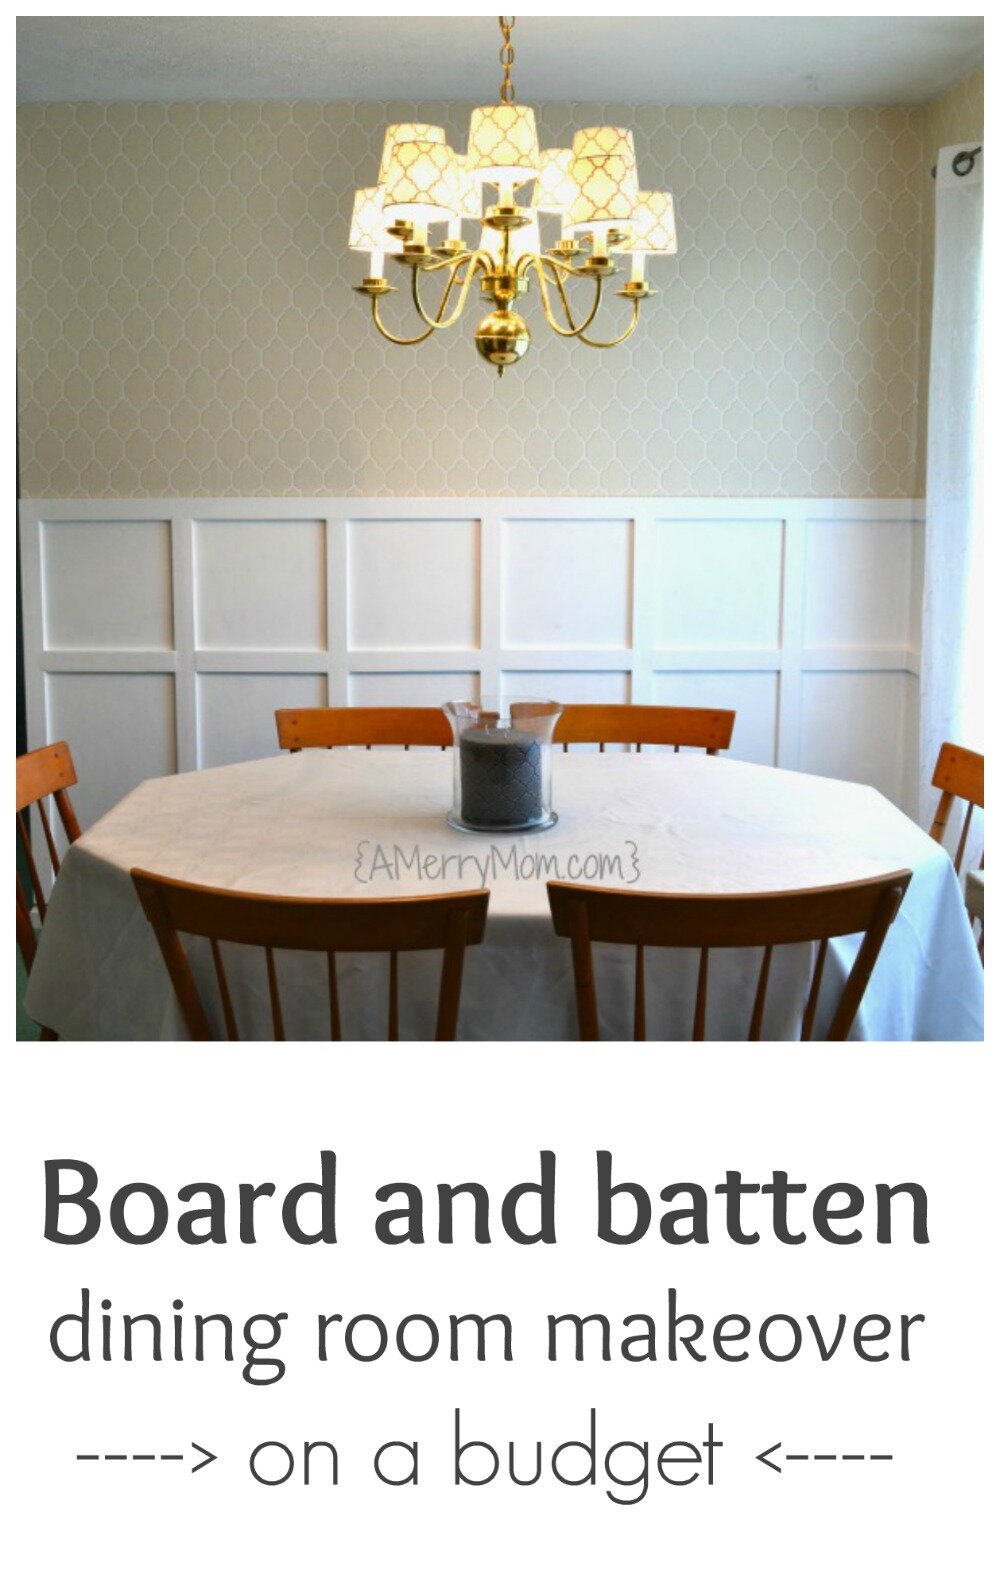
I finally completed the project I’ve been wanting to do for a long time: my board and batten dining room makeover!

The new look is so lovely and refreshing in our dining room! And it required just a small budget to make a big change.
The wallpaper dilemma
When we moved into our 1960s-era house, the exterior, location, and layout were right, but it was a fixer upper. One of the problems? It was covered in flowered wallpaper. Wallpaper was everywhere. Family room. Two bathrooms. Kitchen. Dining room. We scraped and pulled off a lot of wallpaper.
After all that work to strip off the wallpaper, we cleaned and patched up the walls as needed. Then we painted and called it done. Despite our work to patch and sand to even out the walls in the dining room, they did not look perfect.
I admit it: I had rushed through completing this room, and it showed. I should have spent more time patching and sanding the walls. But the wallpaper did not want to come off in that room so progress had been slow. I just wanted to get it done with a solid wall color and move on to the next flowered room.
As soon as we got all the wallpaper off in the rest of the house, I knew I was going to have to revisit the dining room. While I worked on other projects, I contemplated what to do about the dining room.
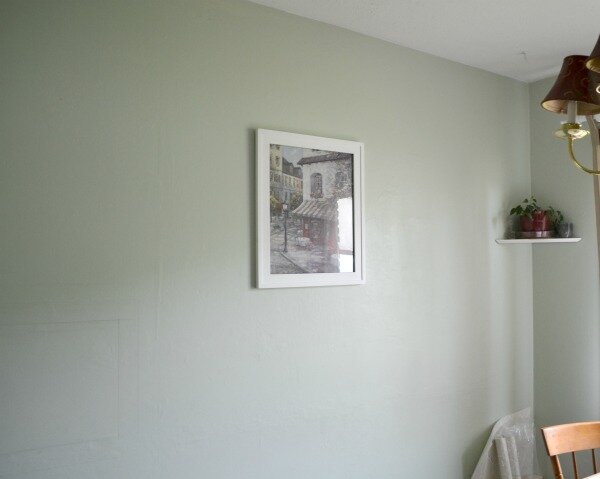
The walls looked so boring before the board and batten dining room makeover. This picture shows some sketches on the wall where I was working out my board & batten placement.
I love the look of board and batten, and I was happy to realize that board and batten would cover most of the issues on the walls in the dining room. I also realized that I could solve the rest of the issues with my dining room walls by putting wallpaper at the top above the board and batten.
When I was going through the process to remove old wallpaper, I would have never believed I would actually decide to put wallpaper on any walls ever. But ultimately it just seemed like the right solution in our dining room to go above the board and batten on the walls.
The benefit of new, modern wallpaper? Many wallpapers today are formulated to come off walls better than older wallpapers did. I made absolutely sure that the type I chose was designed to come back off the walls easily.
Planning the board and batten look
After I decided on a board and batten dining room makeover, the project scared me off for a long time.
With all of the wood that would need to be cut, it seemed unattainable, given my long-standing fear of power tools. Finally I decided it was time to just do it. I purchased an inexpensive miter saw and got to work.
It took some time to figure out the right layout on my walls. I measured and drew it all out on paper first, which really helped visualize the look. I decided on two-tiered look, with a rectangle at the bottom and a square at the top. The rectangle length is double the length of the square.
In the planning phase, I figured out how to work around outlets, a light switch, and a vent to achieve the best look for the boards. It also allowed me to figure out how much wood I would need.
To keep the costs down (and the wood cutting to a minimum), I decided to use furring strips as my wood for this project. Their width is perfect, so I just had to cut them to the right lengths.
An issue with using furring strips was that the quality of wood seemed to vary a lot from board to board. I really had to dig through the inventory at my local stores to find acceptable pieces for my walls. Some of the pieces for sale were warped, some had splintered wood. I ended up going to more than one store to find the right amount of wood.
Despite the challenge finding the furring strips, the price was right. The furring strips cost $1.45 for 8-foot-long boards (1×3 size). I used 14 boards in my dining room for a cost of just $20.30 + tax for the wood.
Not bad, right?
Installing the board and batten
Before installing the wood for my board and batten dining room makeover, I had to sand the wood. Because I was using furring strips, the wood was rough.
Sanding the wood took some time. I used a handheld orbital sander to sand each piece. I went over the wood with a medium-grit sandpaper and then a fine-grit sandpaper to get each piece nice and smooth. The wood felt great after a thorough sanding. Sanding also removed the black & green stamped markings that were on some of the furring strips.
Then I got started measuring and cutting the wood. I was happy that my new miter saw was very easy to use, and the cutting was done quickly.
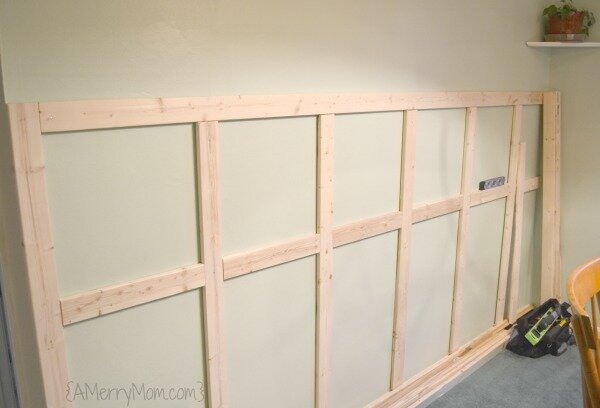
The wood went up on the wall easily. It just took some time to work around the room to attach each piece.
I used a level to keep everything straight and a stud finder with an electric wire sensor (Amazon affiliate link) to determine where to attach (and where not to attach) the boards to the wall.
Once all of the wood was up, I felt a great sense of accomplishment! But my work was not done yet.
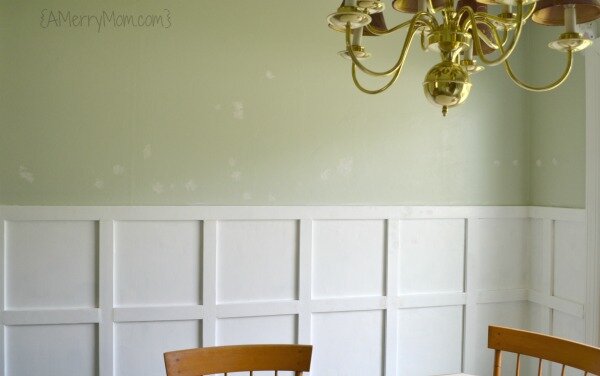
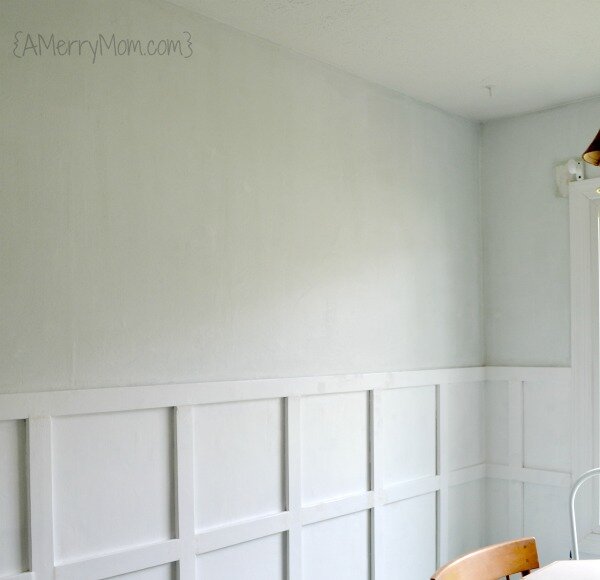
I painted the board and batten portion of the dining room walls with Valspar Signature high-hiding paint + primer in ultra white ($34).
Installing the wallpaper
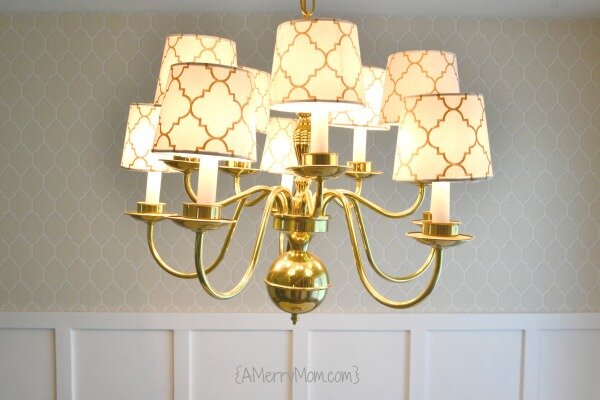
For my wallpaper, I selected the York Wallcoverings Casabella II Moroccan Trellis design. I found it in stock at a local wallpaper dealer for a great price – $72 for two double rolls. It’s also available online (Amazon affiliate link).
This wallpaper is listed as strippable, so I hope that it will come down easily if I decide in the future to change the look in the dining room. At the store, I was advised that using wallpaper primer is key for ensuring that the wallpaper will come back off easily.
I used the Zinsser Shieldz universal wallcovering primer (Amazon affiliate link) to prep my walls for the wallpaper. The wallpaper went up fairly easily over the primer.
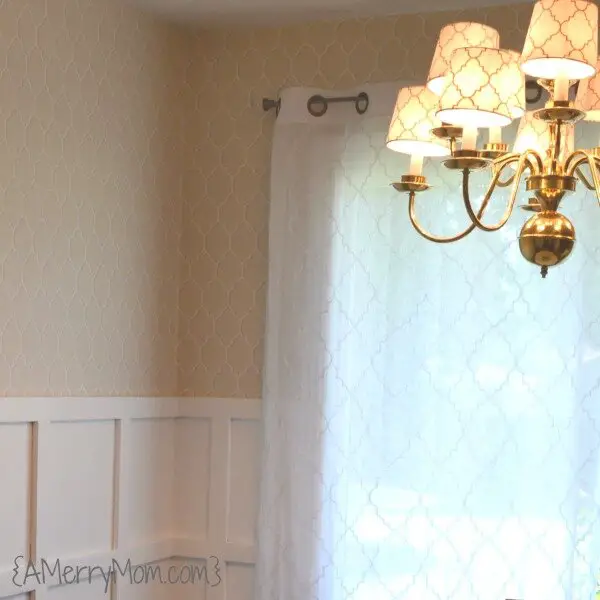
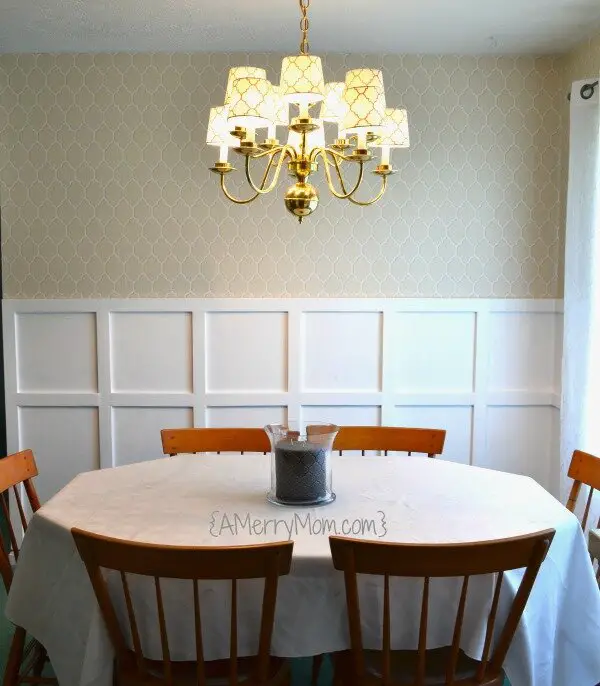
I love the finished look of my board and batten dining room makeover with the wallpaper!
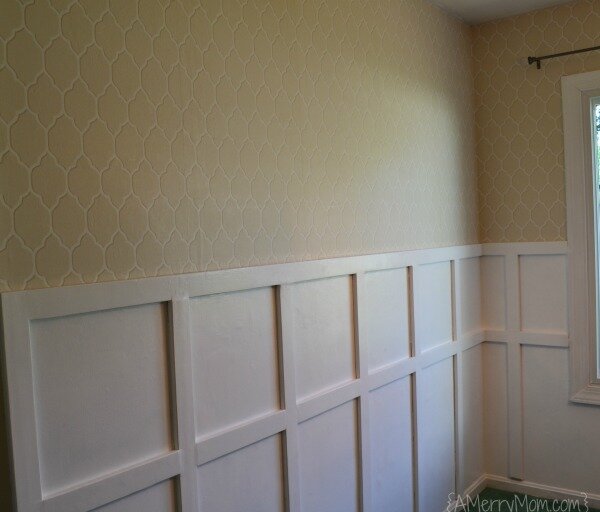
And here it is from another angle. The lighting in the room makes it hard to capture the true tone of the wallpaper, but it’s a light bisque and white pattern. It’s a refreshing color palette in the dining room
The picture below shows the new look paired with the antique dining chairs from my husband’s grandparents.
Have you incorporated board and batten in your home?
When I went to a recent new home show, board and batten was a popular design element in the houses. Although it seems to be very trendy right now, board and batten is a classic style that I think will stand the test of time.
Staying on budget
For this DIY project, my total cost was under $150. The primary costs were about $20 for the wood, $34 for paint, and $72 for wallpaper – adding up to $126. I had a few other costs for painting supplies, nails, etc., bringing the total to around $150 for the board and batten dining room makeover.
Later I added a few other inexpensive finishing touches to complete our budget dining room makeover.
It was small price to pay for a major style update. The fresh new look makes our family so happy to sit down for family meals in the renovated dining room!
This post contains affiliate links, which help support this site. Please refer to my
disclosure statement for more information about affiliate links.
I shared this board and batten dining room makeover at some of these link parties.